Are you trying to test the PH of your pool but don’t know how?
Maybe you have a test kit on hand and you’re not sure how to use it correctly, or perhaps you don’t have a test kit at all?
No worries, this article will walk you through how to test your pool’s pH level with a liquid kit or testing strip.
Why Test Your Pool’s pH Level?
The pH level of your pool water is the center of everything when it comes to pool chemistry.
In other words, if your pH is too far out of whack, it’s only a matter of time before the rest of your chemical levels begin to suffer.
What happens then? Well…
- Your sanitizer gets weaker
- Your water becomes harsher
- Your water gets cloudy
- Your pool surfaces become compromised
- Your pool equipment gets damaged
Regularly testing your pH (at least twice per week) is the safest way to avoid these issues, so make it part of your regular maintenance schedule.
How to Test Pool pH Using a Liquid Testing Kit
Liquid testing kits (or drop testing kits) are an age-old tool for testing pool water and are considered to be the most accurate.
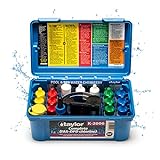
If you’re going to use this type of test, we recommend this one:

Even if you’re not using our recommended kit, the following steps should apply as long as it’s also a liquid test kit.
Step 1. Fill the Testing Tube
First, you’ll need to fill your testing tube with pool water.
When doing this, it’s important not to pull from dead zones (areas with little to no circulation), so avoid things like corners and steps. Also, stay away from return lines as these often contain a higher concentration of chemicals.
Once you’ve picked a suitable spot, place the tube about a foot deep in the water. You may need to rotate it slightly before it begins filling with water.
The water should meet the fill line marked on the testing tube.
Some people find it easier to take a sample from the pool and pour it directly into the tube, but either way works.
Step 3. Add the Required Drops of Phenol Red
Phenol red, or phenolsulfonphthalein (try saying that 3 times), is a reagent that will change the color of your water based on the pH.
Most liquid test kits include this reagent.
Most kits also require adding 5 drops to your test tube for an accurate pH reading, though it’s worth checking your specific kit to be sure.
When adding the drops, hold the phenol red bottle vertically above the test tube and wait for the required number of drops to fall. Accidentally adding too much solution will void the test.
Don’t forget to properly secure the reagent before storing it away.
Step 4. Mix the Solution
Next, you’ll need to carefully mix the reagent in the testing tube.
First, place the cap on the tube.
While some pool owners prefer to shake the tube at this stage, many kits actually advise against this.
Instead, the correct approach is to turn the tube upside down a few times, back and forth, until you begin to see a solid color.
Step 5. Read the pH Level
After mixing the solution, it should only take a few seconds for the reagent to settle on a color.
Now, all that’s left to do is to hold the test tube up to a light source (natural light is also fine) and take note of the results.
How do you read the results of a liquid test kit?
Simply compare the color of your water (in the test tube) to the pH color chart on the kit, which is usually printed on the testing kit itself.
You might not get an exact color match but you should be able to read between the lines if the water pH is slightly darker or lighter than shown on the chart.
Remember: The ideal range for pH in a pool is 7.4 to 7.6, though anything between 7.2 and 7.8 is considered acceptable.
Step 6. Empty and Clean
Finally, dispose of the water by throwing it onto the lawn.
It’s not advisable to empty the water back out into your pool once the reagent has been added.
Once emptied, you should rinse the testing tube in the pool so it’s clean and ready to go for future testing.
How to Test Pool pH Using Testing Strips
Testing strips offer a faster approach to testing pool water, and while they still may not be quite as accurate as drop tests, the gap is certainly closing.
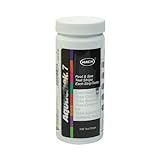
If you’re going to use this type of test, we recommend this one:

Again, this process should look similar regardless of brand, as most test strips work the same way.
Step 1. Remove a Strip from Your Pack
Take your pack/box of strips and carefully remove one.
You’ll need to pinch the white end of the strip throughout this entire process while being careful not to touch the colored parts on the opposite end. Accidentally touching these can spoil the strip and render the results inaccurate.
Be sure to close the lid properly; they can deteriorate if exposed which will also cause them to be inaccurate when you eventually get around to using them.
Step 2. Dip the Strip Into Your Pool Water
Go to the edge of your pool and dip the strip into the water. Aim for a patch of water that’s well circulated.
To make sure the colored squares on the test strip are fully submerged when you’re doing this, it’s a good idea to put the strip all the way in until your fingers touch the water.
If you find it easier to take a sample from the pool and dip your strip into that instead, by all means, take that approach instead.
Step 3. Wait for the Colors to Change
After pulling the test strip out of the water, you should immediately start to see the little squares change color.
Don’t shake the strip or put it anywhere that might cause it to dry. Simply keep it pinched between your fingers or place it on a cool, dry surface.
Allow up to 30 seconds for this process to finish before taking a reading.
Step 4. Check the Colors Against the pH Chart
Unless you’re using a pH-only testing strip, you’ll likely be seeing multiple colors that each represent a different chemical.
These typically include pH, total alkalinity, total chlorine, and free chlorine. Some will also test for hardness and stabilizer levels.
The pH reading is usually the very first or very last square on the strip, but you should be able to match it up easily by looking at the chart provided (which is often printed on the packet that houses the strips).
Simply compare the color of the pH square on the strip to the pH range on the chart to see where your current pH level sits.
Step 5. Discard the Test Strip
Once a test strip has been used, the colors will eventually fade and won’t respond anymore when submerged in water.
Since the strip can’t be used again, you can go ahead and throw it away.
Pro tip: If you need to refer back to your results later, it’s a good idea to take a photo of strip shortly after performing the test.
Can You Test Pool pH Without a Kit?
Yes, there are ways to test pH without using a testing kit.
Realistically, though, you can’t rely on these methods for maintaining a pool, especially given the frequency of testing required; it’s just not practical.
At a bare minimum, you could grab some strips that only test for pH (meaning they’re not part of a kit).
Even then, testing pH alone just isn’t enough to keep your water balanced, so it makes more sense to purchase a kit that also checks the other important chemical levels, like total alkalinity, calcium hardness, sanitizer, and cyanuric acid.
Seriously, do yourself a favor and invest in a kit.
Ready… Set… Test!
The whole process can take anywhere from 1-15 minutes depending on which method you use, but either way should give you an accurate enough reading.
Of course, depending on your results, you may then have to raise the pH or lower the pH to get it back into the ideal range (7.4 to 7.6), but that’s easy enough if you have the right chemicals to hand.
Good luck!
