Calcium hardness plays an important role in your pool chemistry.
Too low, and your water becomes aggressive as it tries to seek out calcium wherever it can. Too high, and calcium falls out of solution, scaling your surfaces and clogging up your filtration system.
This is why we’re going to walk you through exactly how to test calcium hardness in a pool, step-by-step.
What’s the Ideal Calcium Hardness Level?
The ideal calcium hardness level for a pool is often said to be between 200 and 400 parts per million (ppm).
However, a more precise range can be given based on the type of pool you own, such as concrete, fiberglass, or vinyl.
- A concrete pool, whether it has a plaster, aggregate, or tile finish, is typically what’s thought of when talking about the 200-400 ppm range.
- A fiberglass pool sometimes comes with a calcium coating that makes it somewhat susceptible to aggressive water, so the recommended range is slightly lower at around 150-250 ppm.
- A vinyl liner pool is often lumped in with fiberglass pools at 150-250 ppm, however, it’s by far the least susceptible to aggressive water which means there’s technically no lower limit.
Did you know? Calcium hardness is a factor of LSI, which is what really drives the negative side effects of having too much or too little calcium.
Test Strips or Drops to Measure Calcium Hardness?
Both test strips and liquid test kits will measure the amount of calcium in a pool, so you can technically use either method to get a reading.
With that being said, test strips are unable to measure calcium hardness (as in just calcium concentration). Instead, they measure calcium and magnesium together, otherwise referred to as total hardness.
Liquid test kits not only allow you to test for calcium hardness specifically, but they’re also much more accurate in doing so.
Overall, unless you’re just looking for a ballpark number, drops are the way to go.
Important: Some test strips say they test for calcium hardness in place of total hardness, but this is misrepresented. There are no commercially available pool testing strips that measure calcium independently.
How to Test Calcium Hardness in Your Pool (Using Drops)

As explained above, test strips are only able to test total hardness which means you will need a liquid testing kit to perform a true calcium hardness test.
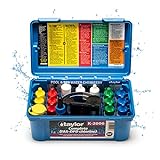
The steps below are based on the popular Taylor liquid test kit, so you may need to consult your manual if using a different brand.
Here’s how to perform a calcium hardness test using drops:
1. Take Your Water Sample
Assuming your plastic test container is clean, submerge it into your pool until it fills up with water.
You should be taking your sample from a well-circulated area of your pool–as in, away from dead spots like corners and behind ladders–but not directly in front of a return jet that could be carrying concentrated chemicals.
It’s also important to ensure the water sample sits at the marked level on the container, so be prepared to spill some out if you took too much.
2. Add 20 Drops of R10 Reagent
Now it’s time to pull out your reagents.
The first one you’ll be using is the R10 reagent, which is essentially just a buffer for the reagents that follow. You can almost think of this as laying cement before placing a brick.
Count exactly 20 drops of R10, place the cap on the container, and turn upside down (a few times) to properly mix the solution.
Do NOT shake it.
3. Add 5 Drops of R11 Reagent
Next, you’ll be adding the R11 reagent.
This is a calcium level indicator that will turn your water a shade of pink, getting it ready for the final part of the test.
Count exactly 5 drops of R11 and repeat the procedure above to mix the solution.
4. Add Drops of R12 Reagent Until Blue
R12 is the final reagent used in this test.
Unlike the two previous reagents, this one needs to be added until the water turns blue (not dark pink or even purple, but a solid shade of blue). You may also need to lightly swirl the container after each drop.
Taylor recommends adding one additional drop once you believe you’ve reached a solid blue, then removing that drop from the count if the color no longer changes as expected.
The total number of R12 drops it takes to achieve this color will be used to measure your calcium hardness level in the last step.
5. Multiply to Get Your Calcium Hardness Level
Now, simply multiply the number of drops by 10 to get the calcium hardness level in parts per million (ppm).
For example, if you used 15 drops to turn the water blue, multiplying 20 by 10 would give you a low calcium hardness reading of just 150 ppm – which means having to add calcium chloride to raise it up.
And if you used 50 drops to turn the water blue, multiplying by 50 by 10 would give you a high calcium hardness reading of 500 ppm – which means having to drain and refill your pool with softer water to lower it down.
How to Test Total Hardness in Your Pool (Using Test Strips)

As mentioned above, you can use test strips to test total hardness, which includes both calcium and magnesium.
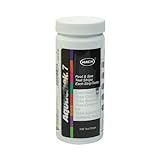
The steps below are based on the popular Aquachek pool testing stips, though most strips work exactly the same way.
Here’s how to perform a total hardness test using strips:
1. Dip a Strip Into Your Pool
Take a test strip from the container, being careful to only touch the white areas of the strip itself. Any accidental touches of the colored pads will compromise the rest and render the results void.
Submerge the entire strip into a well-circulated patch of your pool. Keep it colored pads below the waterline for a few seconds. When removing the strip from your water, do NOT shake it.
2. Wait Time for the Colors to Change
Place the wet test strip onto a flat surface and allow some time for the colors to change as they react to the water.
This process usually takes up to 30 seconds, but it’s a good idea to reference the instructions for your particular test strips.
3. Compare Against the Color Chart
Finally, compare the color on your test strip to the provided color chart. This is usually printed on the strip container.
If you’re just interested in total hardness, you’ll need to look at which colored square represents total hardness, which will match the order shown on the bottle or container.
A lighter shade will indicate a low total hardness, whereas a darker shade will indicate a high total hardness – keeping in mind this parameter includes both magnesium and calcium concentrations.
Important: there’s no way to subtract magnesium from calcium without performing a liquid drop test, therefore high magnesium could easily be mistaken as having a high calcium hardness level, when it may in fact be perfect.
How Often Should You Test for Calcium Hardness?
You should test calcium hardness as often as every month, and as little as twice per year.
However, testing for calcium is necessary when certain issues arise with your water, such as etching or pitting of plaster, scaling of surfaces and equipment, or persistent clouding of your water.
Testing should also be more frequent with more frequent top-offs, as certain water sources may contain more mineral content than others (particularly local well water).
It’s Not That Hard…ness
Calcium hardness is one of the primary markers of a well-maintained pool, so staying on top of it is essential.
Fortunately, while testing for calcium concentration in isolation requires a liquid testing kit, this test is only required a few times a year or when you’re seeing issues with your pool water.
